Today we bring you a small tutorial about how to open the CIWL sleeping coach made by LS Models, to be able to work the insides, putting some characters and lights or just to admire the great reproduction which we have on our hands.
We are going to take as a begining the sleeping coach Type S, from the reference 98016 from LS Models. It is an “iberic” version, even though the steps are the same for other CIWL coaches from this brand (with some small diferences depending on the coach).
1. View of the car. As we can see, it is an exceptional detailed model.

2. We start taking out from the anchorage the pieces and the banisters from both testers which join the ceiling and the box. They are not sticked, so we can just take them out with the help of tweezers. We can use some pieces of paper to avoid them to get in the holes again.
3. Pressing softly with the fingers close to a tester, we can put a plastic strip wich will help us to take out the anchorages along the ceiling.
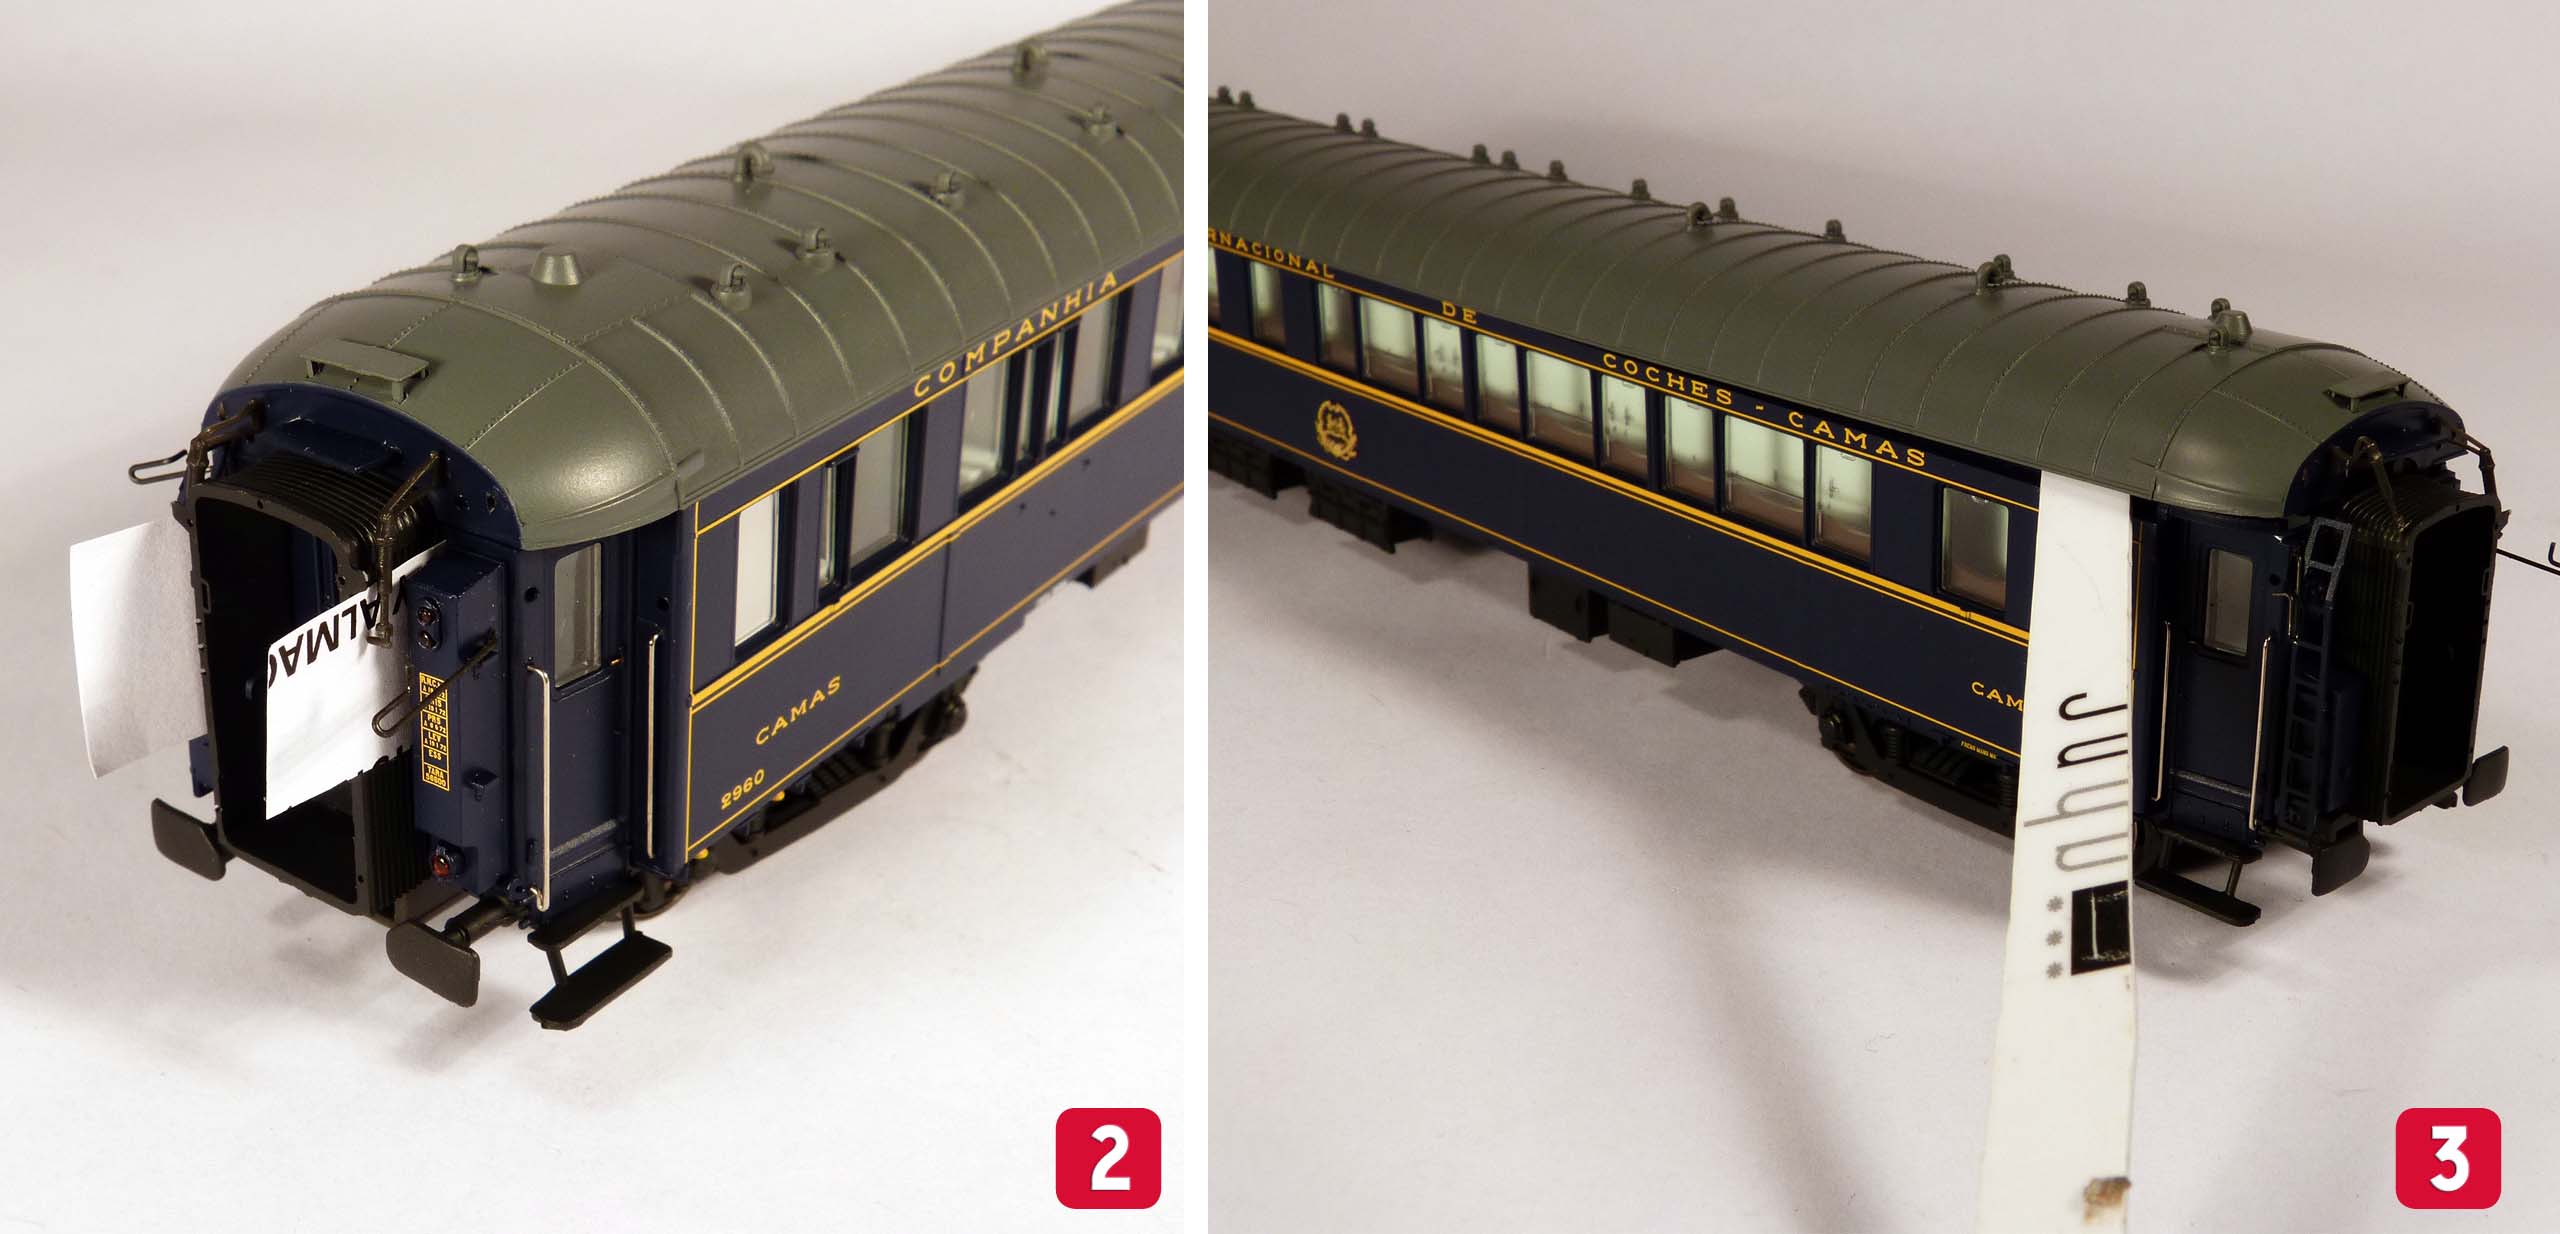
4. We repeat the same operative on the other side and then we can remove the ceiling. In the image you can see the ceiling anchorages, which are very resistent, something we are going to thank in order to avoid accidents or breakages.
5. To separate the bodywork from the frame we will use the plastic strip again, we will put it in the place as we can see in the picture.
6. Once we have the first strip placed, we will put in a new one in the same place and we will move it along the bodywork to take out all the anchorages.
7. Then we have to take out the plastic clips wich join the bodywork and the frame by the testers. This step is the most complicated, because of the small space. With the help of a small flat screwdriver we are going to be able to prise the piece and take it out.
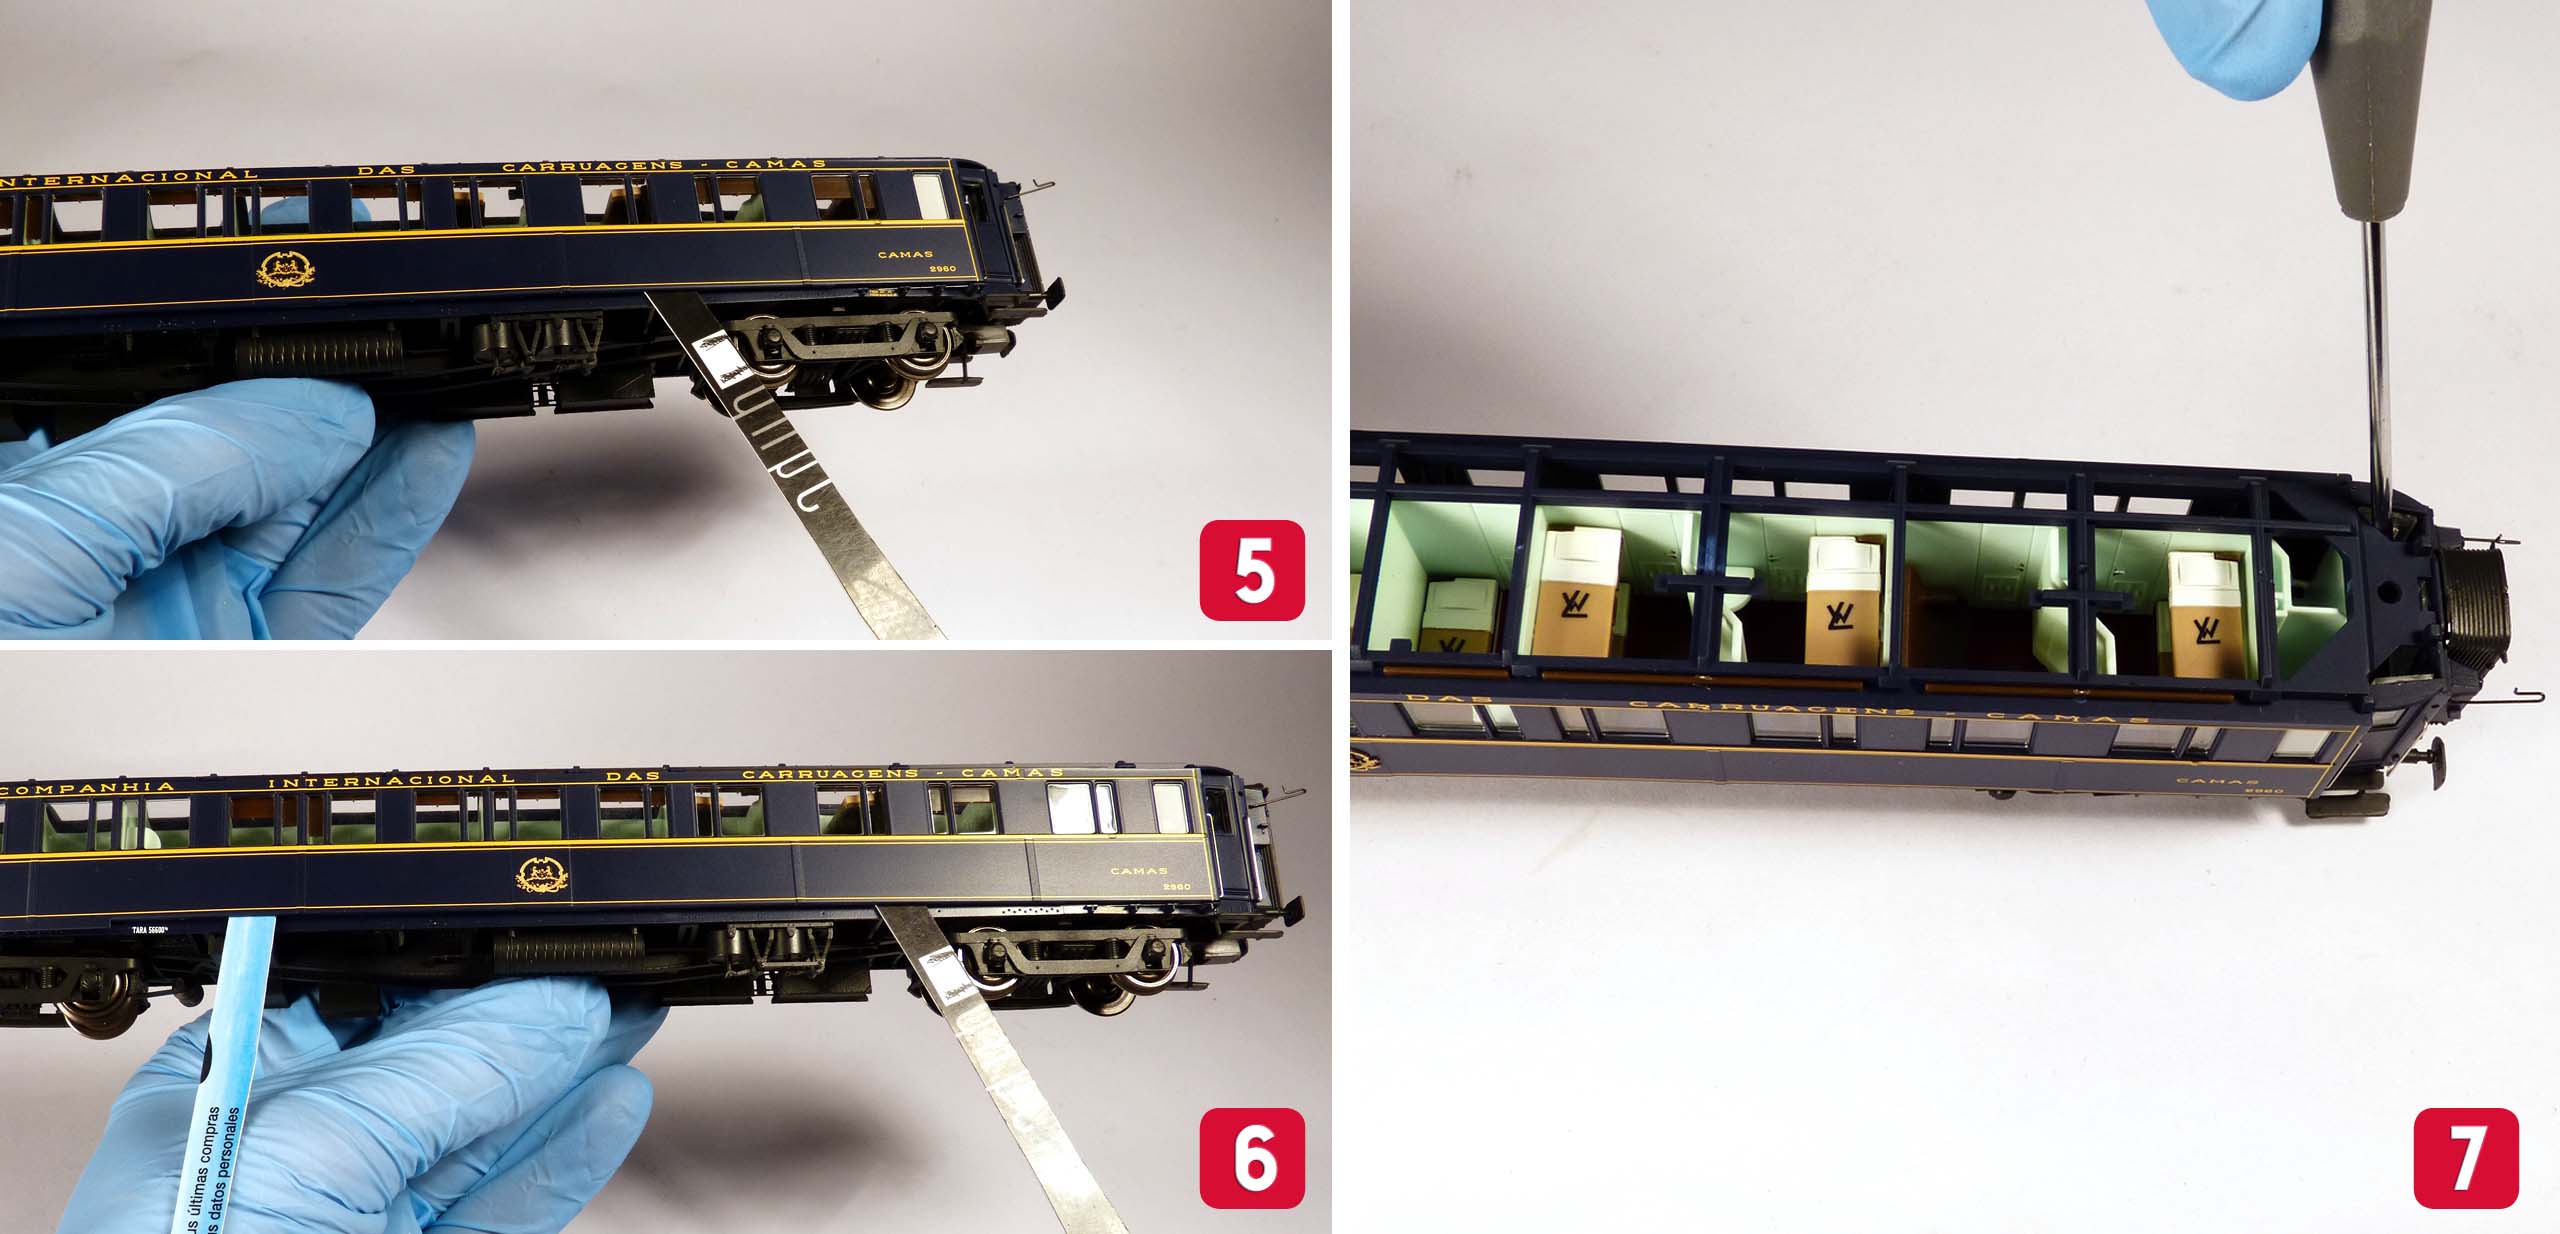
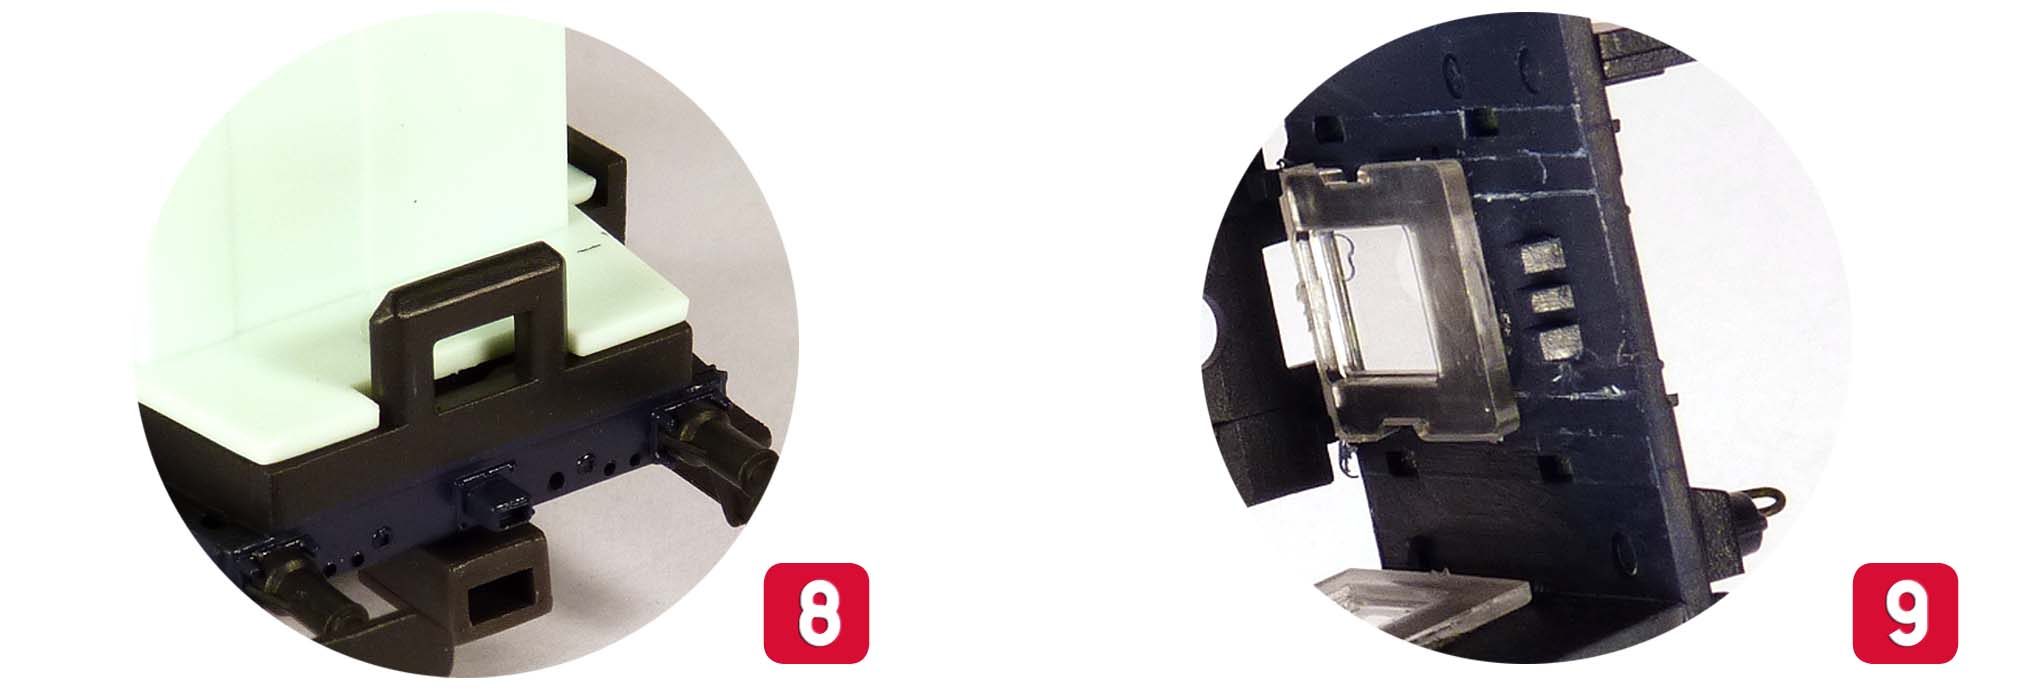
8 y 9. In this image we show you the anchorage in both parts, the bodywork and the frame.
10. Once you have done all the steps, the bodywork is separated from the frame.

That easy! To put it back to its place, we just have to follow the steps in reverse order.


