Frecuently, in our models, we want to represent those concrete walls that we see in the villages, cities or industrial areas. We wonder why most times they get that blue or grey finish, when the actual walls have multiple colors; from ocher, passing through greys and ending with green tones.
We don’t really need an infinity of colors to represent that huge range of tones and colors, and getting a realistic finish of this material, so often used nowadays.
In this case, we are going to paint the reference R001 from El Taller del Modelista, a 1/87 scale concrete wall. The materials that we are going to need to be able to make this wall are just a few. We are going to use: cyanocrylate glue, Humbrol and Vallejo (gama MODEL AIR) paints, wash inks from the MODEL WASH serie from the same brand, and some brushes; in this case, from AMMO: numbers 1 and 3, and a flat brush from Vallejo. And, of course, an airbrush.
1-2. Introduction of the reference R001 from El Taller del Modelista.
3-4. We use a small saw blade to be able to cut the drinkers from our resin pieces.

5. Clean and masked pieces from the drinkers, ready to get the primer layer.

6. We make some holes in the base of the pillars with a 1mm drill and a pin vice.
7-8. We put a 1 mm bolt, which will help us to manipulate the wall and then fix it to the model.

9. We fix the different parts with cyanocrylate. We put our wall on a wood strip, in order to make it easy to paint and manipulate it.
10. We prime our piece with a MR. Surface 1500 spray, in black color.
11. Chosen colors to put the base layer on our wall, in this case from the Vallejo MODEL AIR range.

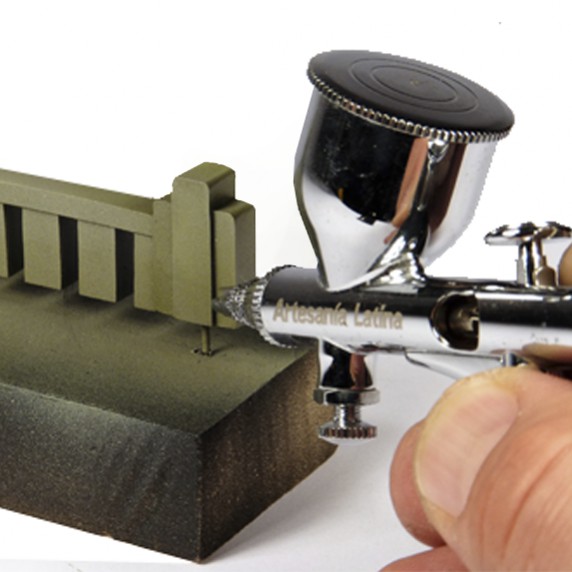
12 y 13. We apply the paint with the airbrush. We mix the paint in different proportions to give volume to the wall, projecting different tones depending on the light over the piece.
14. Wall with the base paint on it, we can see how the piece starts to get volume.

15. Colors in ink format or wash from the serie Model Wash from Vallejo Acrylics. This color serie works very good to create shadow areas and give more volume to this kind of pieces. They are semitransparent colors which, when they dry up, the create very delicated shadows.
16-17. We project, in a medium pressure (1 bar) the colors mentioned before, overlaying tones we create very interesting effects.
18-19. Piece with the shadows applied.

20-21.We prepare a dark wash with the Humbrol enamels. This paint, when it dries up, produces a matt finish. We always must use its specific thinner, in order to get the best result. The percentage from the mix should be 40% paint, 60% thinner.
22. We apply the Humbrol thinner on the surfave where we want to make the wash, letting it evaporate for some seconds. In this way, the paint flows much better through the nooks.

23. With a liner brush, we put the wash on the areas which we consider. Depending on the intensity that we want to give it the shadows, we will have to repeat the operation several times.
24. We use the enamels again, this time we will use them to highlight the rought texture from the concrete. One of the advantages that this wall brings us is the realisti texture and the good reproduction quality.
25. Through the dry brush technic, we go highlighting the wall texture and its pillars. This simple technic is very proper to represent stone textures and porous materials.
26. With the MODEL WASH serie colors from Vallejo Acrylics, we are going to create some drain effects and small spots of moisture and dirt on the surface of the concrete.

27. Strengthening the wash tones that we put before, we keep bringing more tones with these inks, semi transparents. In this way, the shadows overlay creating very interesting color transitions.
28-29. General and detail view of our wall, we can appreciate the variety of textures and colors that our wall shows now.

30. We give an extra matt varnish layer from the brand AMMO, this varnish is extraordinary because of its finish. In this way we remove the shines produced by the use of different kind of paints.
31. The piece is finished with the varnish layer on it.
32-33. We are going to apply some surface vegetation on some areas from our wall. We will need white glue and the reference SP4180 from Scenearama serie. We thin the glue, in order to make the application easier.
34. We start putting the materials before described in small recipients (the plastic blisters where some products are packed are perfect).

35. We apply the glue and water mixture on the areas where we want to put our lichens.
36. Sin dejar secar la cola depositamos pequeñas porciones de material. Without letting the glue dry up, we put some small portions of the material.
37. Pictures from the finished wall with the lichens and small plants on it.

·ENRIQUE CALDERÓN·


